Showing posts with label WebServer. Show all posts

Nov 9, 2016

LEMP stack 에 WordPress 설치방법

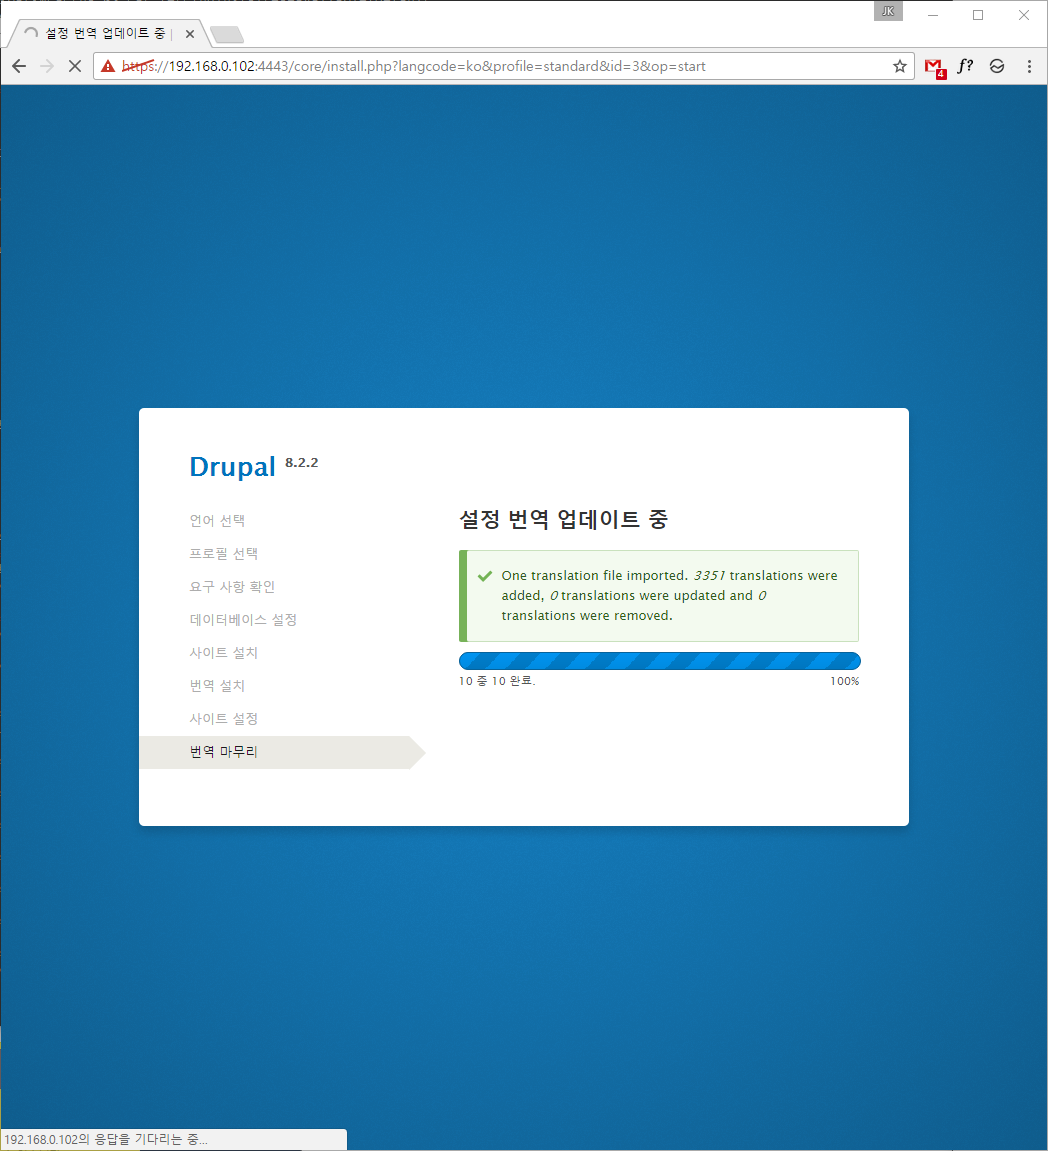
Drupal 8 설치 후 테마, 모듈 수가 너무 적어서 Drupal 7을 설치하려고 했지만 WordPress를 설치하여 차이를 느껴보고 싶었다.


WordPress vs Joomla vs Drupal


설치 방법은
https://www.digitalocean.com/community/tutorials/how-to-install-wordpress-with-lemp-on-ubuntu-16-04 와
https://www.digitalocean.com/community/tutorials/how-to-install-wordpress-with-nginx-on-ubuntu-14-04 를 참고하였다.


설치 전 :
WordPress를 설치하기 전에 LEMP stack 이 설치되어있어야 하고, SSL가 활성화되어있어야 한다. 우분투 버전은 16.04 에서 진행하였다.

LEMP stack 설치 방법


Step1: WordPress를 위한 Database 생성 및 유저 생성

jkpark@cactus:/var/www/html$ mysql -u root -p
Enter password:
Welcome to the MariaDB monitor.  Commands end with ; or \g.
Your MariaDB connection id is 1405
Server version: 10.0.27-MariaDB-0ubuntu0.16.04.1 Ubuntu 16.04

Copyright (c) 2000, 2016, Oracle, MariaDB Corporation Ab and others.

Type 'help;' or '\h' for help. Type '\c' to clear the current input statement.

MariaDB [(none)]> create database wordpress;
Query OK, 1 row affected (0.00 sec)

MariaDB [(none)]> grant all privileges on wordpress.* to wordpressuser@localhost identified by 'your_passsword';
Query OK, 0 rows affected (0.00 sec)

MariaDB [(none)]> flush privileges;
Query OK, 0 rows affected (0.00 sec)

MariaDB [(none)]> exit
Bye
jkpark@cactus:/var/www/html$

Step2: Nginx 설정

  4     root /var/www/html/wordpress;
  5     index index.html index.htm index.php;
  6     server_name 192.168.0.102;
  7     location / {
  8         index index.php;
  9         try_files $uri $uri/ /index.php$is_args$args;
 10 #try_files $uri $uri/ =404;
 11     }

테스트 & 재시작

jkpark@cactus:/var/www/html$ sudo nginx -t
nginx: the configuration file /etc/nginx/nginx.conf syntax is ok
nginx: configuration file /etc/nginx/nginx.conf test is successful
jkpark@cactus:/var/www/html$ sudo systemctl restart nginx
jkpark@cactus:/var/www/html$

Step3: WordPress 다운로드

jkpark@cactus:/tmp$ curl -O https://wordpress.org/latest.tar.gz
  % Total    % Received % Xferd  Average Speed   Time    Time     Time  Current
                                 Dload  Upload   Total   Spent    Left  Speed
100 7774k  100 7774k    0     0   465k      0  0:00:16  0:00:16 --:--:--  218k
jkpark@cactus:/tmp$
jkpark@cactus:/tmp$ tar xzvf latest.tar.gz

jkpark@cactus:/tmp$ cp wordpress/wp-config-sample.php wordpress/wp-config.php

wp-config-sample.php 샘플설정 파일의 대부분의 설정은 알맞게 되어있어므로 복사하여 기본 설정 파일로 만들어주었다.


jkpark@cactus:/tmp$ mkdir /tmp/wordpress/wp-content/upgrade

upgrade 디렉토리를 생성하고 WordPress를 업그레이드하면 upgrade 디렉토리안에 업그레이드에 필요한 파일들이 설치된다.

/tmp/wordpress 를 /var/www/html/wordpress 로 복사한다.
jkpark@cactus:/tmp/wordpress$ sudo cp -a /tmp/wordpress /var/www/html/wordpress

Step4: 소유권과 권한 설정

여기서 하는 작업은 타당한 접근 권한과 소유권을 설정하는 것이다. 일반유저가 파일을 쓸 수 있어야하고, web server가 파일과 디렉토리에 접근, 조작할 수 있어야한다.

1. 파일의 소유권은 sudo 유저로 한다.

jkpark@cactus:/var/www/html$ sudo chown -R jkpark:www-data /var/www/html/wordpress
[sudo] password for jkpark:
jkpark@cactus:/var/www/html$ ls -al
합계 24
drwxr-xr-x 4 www-data www-data 4096 11월  9 21:53 .
drwxr-xr-x 3 root     root     4096 11월  9 14:24 ..
drwxr-xr-x 8 www-data www-data 4096 11월  2 18:08 drupal
-rwxr-xr-x 1 www-data www-data  612 11월  8 22:06 index.nginx-debian.html
-rwxr-xr-x 1 www-data www-data   20 11월  8 23:58 info.php
drwxr-xr-x 5 jkpark   www-data 4096 11월  9 21:44 wordpress
jkpark@cactus:/var/www/html$

2. 각각의 디렉토리에 setgid 설정으로 새로 생성되는 파일들은 www-data 그룹을 상속받게 한다. 이 설정으로 web server가 생성된 파일들의 group ownership을 가지고 있게 한다.

jkpark@cactus:/var/www/html/wordpress$ sudo find . -type d -exec chmod g+s {} \;
jkpark@cactus:/var/www/html/wordpress$ ls -al
합계 196
drwxr-sr-x  5 jkpark   www-data  4096 11월  9 21:44 .
drwxr-xr-x  4 www-data www-data  4096 11월  9 21:53 ..
-rw-r--r--  1 jkpark   www-data   418  9월 25  2013 index.php
-rw-r--r--  1 jkpark   www-data 19935  3월  6  2016 license.txt
-rw-r--r--  1 jkpark   www-data  7344  8월 17 05:39 readme.html
-rw-r--r--  1 jkpark   www-data  5456  5월 25 06:02 wp-activate.php
drwxr-sr-x  9 jkpark   www-data  4096  9월  7 23:58 wp-admin
-rw-r--r--  1 jkpark   www-data   364 12월 19  2015 wp-blog-header.php
-rw-r--r--  1 jkpark   www-data  1477  5월 24 01:44 wp-comments-post.php
-rw-r--r--  1 jkpark   www-data  2853 12월 16  2015 wp-config-sample.php
-rw-r--r--  1 jkpark   www-data  2853 11월  9 21:44 wp-config.php
drwxr-sr-x  5 jkpark   www-data  4096 11월  9 21:47 wp-content
-rw-r--r--  1 jkpark   www-data  3286  5월 25  2015 wp-cron.php
drwxr-sr-x 17 jkpark   www-data 12288  9월  7 23:58 wp-includes
-rw-r--r--  1 jkpark   www-data  2382  5월 24 01:44 wp-links-opml.php
-rw-r--r--  1 jkpark   www-data  3353  4월 15  2016 wp-load.php
-rw-r--r--  1 jkpark   www-data 34057  6월 15 06:51 wp-login.php
-rw-r--r--  1 jkpark   www-data  7786  7월 13 21:37 wp-mail.php
-rw-r--r--  1 jkpark   www-data 13920  8월 14 01:02 wp-settings.php
-rw-r--r--  1 jkpark   www-data 29890  5월 25 05:44 wp-signup.php
-rw-r--r--  1 jkpark   www-data  4035 12월  1  2014 wp-trackback.php
-rw-r--r--  1 jkpark   www-data  3064  7월  6 21:40 xmlrpc.php
jkpark@cactus:/var/www/html/wordpress$


3. 아래 명령어로 group write permission을 부여하여 web interface 가 theme 와 plugin 변경 가능하도록 한다.

jkpark@cactus:/var/www/html/wordpress$ sudo chmod g+w wp-content
jkpark@cactus:/var/www/html/wordpress$ sudo chmod -R g+w wp-content/themes
jkpark@cactus:/var/www/html/wordpress$ sudo chmod -R g+w wp-content/plugins
jkpark@cactus:/var/www/html/wordpress$
jkpark@cactus:/var/www/html/wordpress$ ls -al wp-content/
합계 24
drwxrwsr-x 5 jkpark www-data 4096 11월  9 21:47 .
drwxr-sr-x 5 jkpark www-data 4096 11월  9 21:44 ..
-rw-r--r-- 1 jkpark www-data   28  1월  9  2012 index.php
drwxrwsr-x 3 jkpark www-data 4096  9월  7 23:59 plugins
drwxrwsr-x 5 jkpark www-data 4096  9월  7 23:59 themes
drwxrwsr-x 2 jkpark www-data 4096 11월  9 21:47 upgrade
jkpark@cactus:/var/www/html/wordpress$


Step 5: WordPress 환경설정


WordPress main configuration 파일을 열었을 때 제일 먼저 해야할 일은 보안키를 설정하는 것이다. WordPress가 제공하는 secure generator를 이용하여 키 값을 만들 수 있다.


jkpark@cactus:/var/www/html/wordpress$ curl -s https://api.wordpress.org/secret-key/1.1/salt/
define('AUTH_KEY',         '(@p -;LQVf1$wxO1 pt&이 글을 복사하지 마세요MhU6+9z2');
define('SECURE_AUTH_KEY',  ')+SoyfkO!HX=vRC(fhb6이 글을 복사하지 마세요Bo&f]KmO');
define('LOGGED_IN_KEY',    'IFBwv/%~3Jwk?(rP,]1C이 글을 복사하지 마세요E ,b]u0V');
define('NONCE_KEY',        '|fHfPA!U,Yh*F:HfZ9[r이 글을 복사하지 마세요eQ?=3>#B');
define('AUTH_SALT',        '|:+NB@<h98|--t)a-dW/이 글을 복사하지 마세요cUx;)x/1');
define('SECURE_AUTH_SALT', 'ZVj.^eMKAtY:5+g:xhu1이 글을 복사하지 마세요T px,TY(');
define('LOGGED_IN_SALT',   'Uv5786a=D%R(~H.zWDJB이 글을 복사하지 마세요Q$XyRWsR');
define('NONCE_SALT',       '$:!yP|#[i8w|FQSBP&&D이 글을 복사하지 마세요4A2=Zp>E');
jkpark@cactus:/var/www/html/wordpress$

생성된 키들을 WordPress 환경설정 파일에 복사한다.
jkpark@cactus:/var/www/html/wordpress$ vi wp-config.php

아래 라인에 위에서 생성한 key들을 붙여넣는다.

 49 define('AUTH_KEY',         'put your unique phrase here');
 50 define('SECURE_AUTH_KEY',  'put your unique phrase here');
 51 define('LOGGED_IN_KEY',    'put your unique phrase here');
 52 define('NONCE_KEY',        'put your unique phrase here');
 53 define('AUTH_SALT',        'put your unique phrase here');
 54 define('SECURE_AUTH_SALT', 'put your unique phrase here');
 55 define('LOGGED_IN_SALT',   'put your unique phrase here');
 56 define('NONCE_SALT',       'put your unique phrase here');


Database 설정

 23 define('DB_NAME', 'wordpress');
 24
 25 /** MySQL database username */
 26 define('DB_USER', 'wordpressuser');
 27
 28 /** MySQL database password */
 29 define('DB_PASSWORD', '비밀번호');
 30
 31 /** MySQL hostname */
 32 define('DB_HOST', 'localhost');
 33
 34 /** Database Charset to use in creating database tables. */
 35 define('DB_CHARSET', 'utf8');
 36
 37 /** The Database Collate type. Don't change this if in doubt. */
 38 define('DB_COLLATE', '');

save and close the file


Step 6: Web Interface를 이용하여 설치를 완료한다.


*: 업그레이드 방법

WordPress의 업그레이드가 가능할 경우 현재 권한으로는 업그레이드를 진행할 수 없다.

위에서 설정한 소유권과 권한으로 보안성이 높아져 소프트웨어가 스스로 update를 완료할 수는 없다.

따라서 업그레이드 시, 임시적으로 web server에게 소유권을 주어 업그레이드를 진행한다.
sudo chown -R www-data /var/www/html/wordpress

업그레이드 완료 시 다시 sudo user에게 소유권을 준다.
sudo chown -R jkpark /var/www/html/wordpress


How to install Drupal 8.2.2

https://www.drupal.org/download 에서 최신버전의 바이너리를 확인


jkpark@cactus:/var/www/html$ sudo wget https://ftp.drupal.org/files/projects/drupal-8.2.2.zip
--2016-11-09 14:26:53--  https://ftp.drupal.org/files/projects/drupal-8.2.2.zip
Resolving ftp.drupal.org (ftp.drupal.org)... 151.101.76.68
접속 ftp.drupal.org (ftp.drupal.org)|151.101.76.68|:443... 접속됨.
HTTP request sent, awaiting response... 200 OK
Length: 21205013 (20M) [application/zip]
Saving to: ‘drupal-8.2.2.zip’

drupal-8.2.2.zip            100%[===========================================>]  20.22M  6.32MB/s    in 3.7s

2016-11-09 14:26:58 (5.53 MB/s) - ‘drupal-8.2.2.zip’ saved [21205013/21205013]

jkpark@cactus:/var/www/html$ ls -al
합계 20728
drwxr-xr-x 2 www-data www-data     4096 11월  9 14:26 .
drwxr-xr-x 3 root     root         4096 11월  9 14:24 ..
-rw-r--r-- 1 root     root     21205013 11월  3 03:08 drupal-8.2.2.zip
-rwxr-xr-x 1 www-data www-data      612 11월  8 22:06 index.nginx-debian.html
-rwxr-xr-x 1 www-data www-data       20 11월  8 23:58 info.php
jkpark@cactus:/var/www/html$
jkpark@cactus:/var/www/html$ sudo unzip drupal-8.2.2.zip

jkpark@cactus:/var/www/html$ sudo mv drupal-8.2.2 drupal
jkpark@cactus:/var/www/html$ ls -al
합계 20732
drwxr-xr-x 3 www-data www-data     4096 11월  9 14:28 .
drwxr-xr-x 3 root     root         4096 11월  9 14:24 ..
drwxr-xr-x 8 root     root         4096 11월  2 18:08 drupal
-rw-r--r-- 1 root     root     21205013 11월  3 03:08 drupal-8.2.2.zip
-rwxr-xr-x 1 www-data www-data      612 11월  8 22:06 index.nginx-debian.html
-rwxr-xr-x 1 www-data www-data       20 11월  8 23:58 info.php
jkpark@cactus:/var/www/html$ sudo rm drupal-8.2.2.zip
jkpark@cactus:/var/www/html$

jkpark@cactus:/var/www/html$ sudo chown www-data: -R drupal
jkpark@cactus:/var/www/html$ ls -al
합계 20
drwxr-xr-x 3 www-data www-data 4096 11월  9 14:29 .
drwxr-xr-x 3 root     root     4096 11월  9 14:24 ..
drwxr-xr-x 8 www-data www-data 4096 11월  2 18:08 drupal
-rwxr-xr-x 1 www-data www-data  612 11월  8 22:06 index.nginx-debian.html
-rwxr-xr-x 1 www-data www-data   20 11월  8 23:58 info.php
jkpark@cactus:/var/www/html$ 

데이터베이스 생성
jkpark@cactus:/var/www/html$ mysql -u root -p
Enter password:
Welcome to the MariaDB monitor.  Commands end with ; or \g.
Your MariaDB connection id is 32
Server version: 10.0.27-MariaDB-0ubuntu0.16.04.1 Ubuntu 16.04

Copyright (c) 2000, 2016, Oracle, MariaDB Corporation Ab and others.

Type 'help;' or '\h' for help. Type '\c' to clear the current input statement.

MariaDB [(none)]> create database drupal;
Query OK, 1 row affected (0.00 sec)

MariaDB [(none)]> grant all privileges on drupal.* to drupaluser@localhost identified by 'your_password';
Query OK, 0 rows affected (0.01 sec)

MariaDB [(none)]> flush privileges;
Query OK, 0 rows affected (0.00 sec)

MariaDB [(none)]> exit
Bye
jkpark@cactus:/var/www/html$

확인

jkpark@cactus:/var/www/html$ mysql -u drupaluser -p
Enter password:
Welcome to the MariaDB monitor.  Commands end with ; or \g.
Your MariaDB connection id is 34
Server version: 10.0.27-MariaDB-0ubuntu0.16.04.1 Ubuntu 16.04

Copyright (c) 2000, 2016, Oracle, MariaDB Corporation Ab and others.

Type 'help;' or '\h' for help. Type '\c' to clear the current input statement.

MariaDB [(none)]> exit
Bye
jkpark@cactus:/var/www/html$


drupal 접속을 위해 nginx default 설정파일을 수정한다.
jkpark@cactus:/etc/nginx/sites-available$ sudo vi default


  4     root /var/www/html/drupal;
  5     index index.html index.htm index.php;
  6     server_name 192.168.0.102;
  7     location / {
  8         index index.php;
  9         try_files $uri $uri/ /index.php$is_args$args;
 10 #try_files $uri $uri/ =404;
 11     }


테스트 & 재시작
jkpark@cactus:/etc/nginx/sites-available$ sudo nginx -t
nginx: the configuration file /etc/nginx/nginx.conf syntax is ok
nginx: configuration file /etc/nginx/nginx.conf test is successful
jkpark@cactus:/etc/nginx/sites-available$ sudo systemctl restart nginx
jkpark@cactus:/etc/nginx/sites-available$

설정


php gd모듈과 xml 모듈 설치

jkpark@cactus:/etc/nginx/sites-available$ sudo apt-get install php7.0-gd php7.0-xml
패키지 목록을 읽는 중입니다... 완료
의존성 트리를 만드는 중입니다
상태 정보를 읽는 중입니다... 완료
다음 새 패키지를 설치할 것입니다:
  php7.0-gd php7.0-xml
0개 업그레이드, 2개 새로 설치, 0개 제거 및 2개 업그레이드 안 함.
139 k바이트 아카이브를 받아야 합니다.
이 작업 후 613 k바이트의 디스크 공간을 더 사용하게 됩니다.
받기:1 http://kr.archive.ubuntu.com/ubuntu xenial-updates/main amd64 php7.0-gd amd64 7.0.8-0ubuntu0.16.04.3 [27.1 kB]
받기:2 http://kr.archive.ubuntu.com/ubuntu xenial-updates/main amd64 php7.0-xml amd64 7.0.8-0ubuntu0.16.04.3 [112 kB]
내려받기 139 k바이트, 소요시간 0초 (583 k바이트/초)
Selecting previously unselected package php7.0-gd.
(데이터베이스 읽는중 ...현재 212758개의 파일과 디렉터리가 설치되어 있습니다.)
Preparing to unpack .../php7.0-gd_7.0.8-0ubuntu0.16.04.3_amd64.deb ...
Unpacking php7.0-gd (7.0.8-0ubuntu0.16.04.3) ...
Selecting previously unselected package php7.0-xml.
Preparing to unpack .../php7.0-xml_7.0.8-0ubuntu0.16.04.3_amd64.deb ...
Unpacking php7.0-xml (7.0.8-0ubuntu0.16.04.3) ...
Processing triggers for php7.0-fpm (7.0.8-0ubuntu0.16.04.3) ...
php7.0-gd (7.0.8-0ubuntu0.16.04.3) 설정하는 중입니다 ...

Creating config file /etc/php/7.0/mods-available/gd.ini with new version
php7.0-xml (7.0.8-0ubuntu0.16.04.3) 설정하는 중입니다 ...

Creating config file /etc/php/7.0/mods-available/dom.ini with new version

Creating config file /etc/php/7.0/mods-available/simplexml.ini with new version

Creating config file /etc/php/7.0/mods-available/wddx.ini with new version

Creating config file /etc/php/7.0/mods-available/xml.ini with new version

Creating config file /etc/php/7.0/mods-available/xmlreader.ini with new version

Creating config file /etc/php/7.0/mods-available/xmlwriter.ini with new version

Creating config file /etc/php/7.0/mods-available/xsl.ini with new version
Processing triggers for php7.0-fpm (7.0.8-0ubuntu0.16.04.3) ...
jkpark@cactus:/etc/nginx/sites-available$ sudo systemctl restart php7.0-fpm.service
jkpark@cactus:/etc/nginx/sites-available$


설치 완료.

How To Install Nginx, MariaDB10, PHP7(LEMP stack) on Ubuntu16.04

LEMP Stack 이란

Linux, Nginx, MariaDB, PHP를 조합하여 줄인말이다.

Apache vs Nginx
Nginx(엔진X)는 Apache의 잘 사용하지 않는 기능을 제외하고 새로운 시대의 요청에 부응하여 만들어진 웹 서버이다.

https://news.netcraft.com/archives/2016/02/22/february-2016-web-server-survey.html

MariaDB 는 MySQL의 불확실한 라이선스 상태에 반발하여 만들어졌으며 MariaDB 5.5버전까지는 모든 MySQL의 특징을 가지고 있었다.
5.5버전 이후 MariaDB만의 색깔을 더 분명히 하고자 개발판을 10.x로 변경하였다.


Step1 : Nginx Web Server 설치

1. install Nginx

jkpark@cactus:~$ sudo apt-get install nginx
[sudo] password for jkpark:
패키지 목록을 읽는 중입니다... 완료
의존성 트리를 만드는 중입니다
상태 정보를 읽는 중입니다... 완료
The following additional packages will be installed:
  nginx-common nginx-core
제안하는 패키지:
  fcgiwrap nginx-doc
다음 새 패키지를 설치할 것입니다:
  nginx nginx-common nginx-core
0개 업그레이드, 3개 새로 설치, 0개 제거 및 2개 업그레이드 안 함.
458 k바이트 아카이브를 받아야 합니다.
이 작업 후 1,482 k바이트의 디스크 공간을 더 사용하게 됩니다.
계속 하시겠습니까? [Y/n] y
받기:1 http://kr.archive.ubuntu.com/ubuntu xenial-updates/main amd64 nginx-common all 1.10.0-0ubuntu0.16.04.4 [26.6 kB]
받기:2 http://kr.archive.ubuntu.com/ubuntu xenial-updates/main amd64 nginx-core amd64 1.10.0-0ubuntu0.16.04.4 [428 kB]
받기:3 http://kr.archive.ubuntu.com/ubuntu xenial-updates/main amd64 nginx all 1.10.0-0ubuntu0.16.04.4 [3,498 B]
내려받기 458 k바이트, 소요시간 0초 (1,224 k바이트/초)
패키지를 미리 설정하는 중입니다...
Selecting previously unselected package nginx-common.
(데이터베이스 읽는중 ...현재 212073개의 파일과 디렉터리가 설치되어 있습니다.)
Preparing to unpack .../nginx-common_1.10.0-0ubuntu0.16.04.4_all.deb ...
Unpacking nginx-common (1.10.0-0ubuntu0.16.04.4) ...
Selecting previously unselected package nginx-core.
Preparing to unpack .../nginx-core_1.10.0-0ubuntu0.16.04.4_amd64.deb ...
Unpacking nginx-core (1.10.0-0ubuntu0.16.04.4) ...
Selecting previously unselected package nginx.
Preparing to unpack .../nginx_1.10.0-0ubuntu0.16.04.4_all.deb ...
Unpacking nginx (1.10.0-0ubuntu0.16.04.4) ...
Processing triggers for ufw (0.35-0ubuntu2) ...
Processing triggers for ureadahead (0.100.0-19) ...
Processing triggers for systemd (229-4ubuntu12) ...
nginx-common (1.10.0-0ubuntu0.16.04.4) 설정하는 중입니다 ...
nginx-core (1.10.0-0ubuntu0.16.04.4) 설정하는 중입니다 ...
nginx (1.10.0-0ubuntu0.16.04.4) 설정하는 중입니다 ...
Processing triggers for systemd (229-4ubuntu12) ...
Processing triggers for ureadahead (0.100.0-19) ...
Processing triggers for ufw (0.35-0ubuntu2) ...
jkpark@cactus:~$


2. netstat, systemctl 또는 브라우저로 nginx 동작 확인 (디폴트 포트80)

jkpark@cactus:~$ sudo systemctl status nginx.service
● nginx.service - A high performance web server and a reverse proxy server
   Loaded: loaded (/lib/systemd/system/nginx.service; enabled; vendor preset: enabled)
   Active: active (running) since 화 2016-11-08 22:06:57 KST; 3min 41s ago
 Main PID: 16028 (nginx)
   CGroup: /system.slice/nginx.service
           ├─16028 nginx: master process /usr/sbin/nginx -g daemon on; master_process on
           ├─16029 nginx: worker process
           ├─16030 nginx: worker process
           ├─16031 nginx: worker process
           └─16032 nginx: worker process

11월 08 22:06:57 cactus systemd[1]: Starting A high performance web server and a reverse proxy server...
11월 08 22:06:57 cactus systemd[1]: Started A high performance web server and a reverse proxy server.
jkpark@cactus:~$


Step2 : HTTP/2.0 프로토콜 활설화

1. lastest release of Nginx binaries의 HTTP/2.0 프로토콜은 SSL과 함께 사용해야 동작된다.
jkpark@cactus:/etc/nginx/sites-available$ sudo mv default default.backup
jkpark@cactus:/etc/nginx/sites-available$ sudo vi default

아래 내용 복사하여 HTTP/2.0 을 활성화한다.
server_name는 자신의 IP주소를 적는다.

server {
listen 443 ssl http2 default_server;
listen [::]:443 ssl http2 default_server;
root /var/www/html;
index index.html index.htm index.php;
server_name 192.168.0.102;
location / {
try_files $uri $uri/ =404;
}
ssl_certificate /etc/nginx/ssl/nginx.crt;
ssl_certificate_key /etc/nginx/ssl/nginx.key;
ssl_protocols TLSv1 TLSv1.1 TLSv1.2;
ssl_prefer_server_ciphers on;
ssl_ciphers EECDH+CHACHA20:EECDH+AES128:RSA+AES128:EECDH+AES256:RSA+AES256:EECDH+3DES:RSA+3DES:!MD5;
ssl_dhparam  /etc/nginx/ssl/dhparam.pem;
ssl_session_cache shared:SSL:20m;
ssl_session_timeout 180m;
resolver 8.8.8.8 8.8.4.4;
add_header Strict-Transport-Security "max-age=31536000;
#includeSubDomains" always;
location ~ \.php$ {
include snippets/fastcgi-php.conf;
fastcgi_pass unix:/run/php/php7.0-fpm.sock;
}
location ~ /\.ht {
deny all;
}
}
server {
listen         80;
listen    [::]:80;
server_name    192.168.0.102;
return         301 https://$server_name$request_uri;
}


2. 위의 default 설정이 끝나면 SSL 사용을 위한 파일을 만든다.

jkpark@cactus:/etc/nginx$ sudo mkdir ssl
jkpark@cactus:/etc/nginx$ sudo openssl req -x509 -nodes -days 3650 -newkey rsa:2048 -keyout /etc/nginx/ssl/nginx.key -out /etc/nginx/ssl/nginx.crt
Generating a 2048 bit RSA private key
..........................................................+++
............................................................................................+++
writing new private key to '/etc/nginx/ssl/nginx.key'
-----
You are about to be asked to enter information that will be incorporated
into your certificate request.
What you are about to enter is what is called a Distinguished Name or a DN.
There are quite a few fields but you can leave some blank
For some fields there will be a default value,
If you enter '.', the field will be left blank.
-----
Country Name (2 letter code) [AU]:KR
State or Province Name (full name) [Some-State]:.
Locality Name (eg, city) []:Seoul
Organization Name (eg, company) [Internet Widgits Pty Ltd]:Indiecoders
Organizational Unit Name (eg, section) []:.
Common Name (e.g. server FQDN or YOUR name) []:.
Email Address []:jkparkr@indiecoders.org
jkpark@cactus:/etc/nginx$

5. DH(Diffie-Hellman)암호키를 만든다.
jkpark@cactus:/etc/nginx$ sudo openssl dhparam -out /etc/nginx/ssl/dhparam.pem 2048
Generating DH parameters, 2048 bit long safe prime, generator 2
This is going to take a long time
...................................................+.................................................................+.................................................+..............................................................................................................................................................+..............................................................................................................................+.............................................................................................................................+.........................+.........+...................................................................................................................................................................................+........................................................................+..............................................................................................................................+.......................................................................................................................................+.....+......+....................................................................................................................................................................................................................................................+...............................................................+.......................................+....................................................................+....................................................................................................................................................................................+....................+...+.............+......................................................................................................................................................................................................+...................................................................................+...................................+.................+....................................................................................+.................................+................................................................................................................................................................................................+.....................+................................................................................................................................................................+...............................................................................................................................................................................................+................................................................................................+.................................+....................................................................................................................................+.+..............................................................................................................................................................................................................+.........................+..............................................................................................................................................................................+...........................................................................................+................................................................................................................................................+...................+..........................................................+....+........................................................................+.............................................................................................................................................+....................................................................................+..........................................................................................................+........................................................+.................................................................+..........................................................................................................+...............................+............................................................................................+.................................................................+.......................+..............................+.............................................................+...............................................................................................................................................................................................................................+...........................................................................+.......................................................................+........+.....................................................................................+........................................................................................................................................................+..........................................................................................................................................................+...................................................................................................................................+........................................................+..........................................................................................................................................................................++*++*
jkpark@cactus:/etc/nginx$


3. DH암호키가 만들어졌다면 Nginx 설정이 제대로 되었는지 확인해본다.

jkpark@cactus:/etc/nginx$ sudo nginx -t
nginx: the configuration file /etc/nginx/nginx.conf syntax is ok
nginx: configuration file /etc/nginx/nginx.conf test is successful
jkpark@cactus:/etc/nginx$
jkpark@cactus:/etc/nginx$ sudo systemctl restart nginx.service
jkpark@cactus:/etc/nginx$

4.  아래 명령어로 Nginx가 HTTP/2.0 프로토콜을 사용하고 있는지 확인할 수 있다.

jkpark@cactus:/etc/nginx$ openssl s_client -connect localhost:443 -nextprotoneg ''
CONNECTED(00000003)
Protocols advertised by server: h2, http/1.1
140205134509720:error:140920E3:SSL routines:ssl3_get_server_hello:parse tlsext:s3_clnt.c:1152:
---
no peer certificate available
---
No client certificate CA names sent
---
SSL handshake has read 87 bytes and written 7 bytes
---
New, (NONE), Cipher is (NONE)
Secure Renegotiation IS supported
Compression: NONE
Expansion: NONE
Next protocol: (2)
No ALPN negotiated
SSL-Session:
    Protocol  : TLSv1.2
    Cipher    : 0000
    Session-ID:
    Session-ID-ctx:
    Master-Key:
    Key-Arg   : None
    PSK identity: None
    PSK identity hint: None
    SRP username: None
    Start Time: 1478612682
    Timeout   : 300 (sec)
    Verify return code: 0 (ok)
---
jkpark@cactus:/etc/nginx$

Step3 : PHP7 설치

1. Nginx w/ FastCGI 세팅을 위해 PHP7과 PHP-FPM을 설치한다.

jkpark@cactus:~$ sudo apt install php7.0 php7.0-fpm

설치가 끝나면 PHP-FPM을 실행하고 체크해본다.

jkpark@cactus:~$ sudo systemctl start php7.0-fpm
jkpark@cactus:~$ sudo systemctl status php7.0-fpm
● php7.0-fpm.service - The PHP 7.0 FastCGI Process Manager
   Loaded: loaded (/lib/systemd/system/php7.0-fpm.service; enabled; vendor preset: enabled)
   Active: active (running) since 화 2016-11-08 23:47:13 KST; 1min 14s ago
 Main PID: 23164 (php-fpm7.0)
   Status: "Processes active: 0, idle: 2, Requests: 0, slow: 0, Traffic: 0req/sec"
   CGroup: /system.slice/php7.0-fpm.service
           ├─23164 php-fpm: master process (/etc/php/7.0/fpm/php-fpm.conf)
           ├─23168 php-fpm: pool www
           └─23169 php-fpm: pool www

11월 08 23:47:13 cactus systemd[1]: Starting The PHP 7.0 FastCGI Process Manager...
11월 08 23:47:13 cactus systemd[1]: Started The PHP 7.0 FastCGI Process Manager.
jkpark@cactus:~$

Step2.1 에서 설정한 Nginx default 설정 파일에 아래 구문을 통해 이미 PHP FastCGI에 대한 설정을 하였다.

location ~ \.php$ {
include snippets/fastcgi-php.conf;
fastcgi_pass unix:/run/php/php7.0-fpm.sock;
}

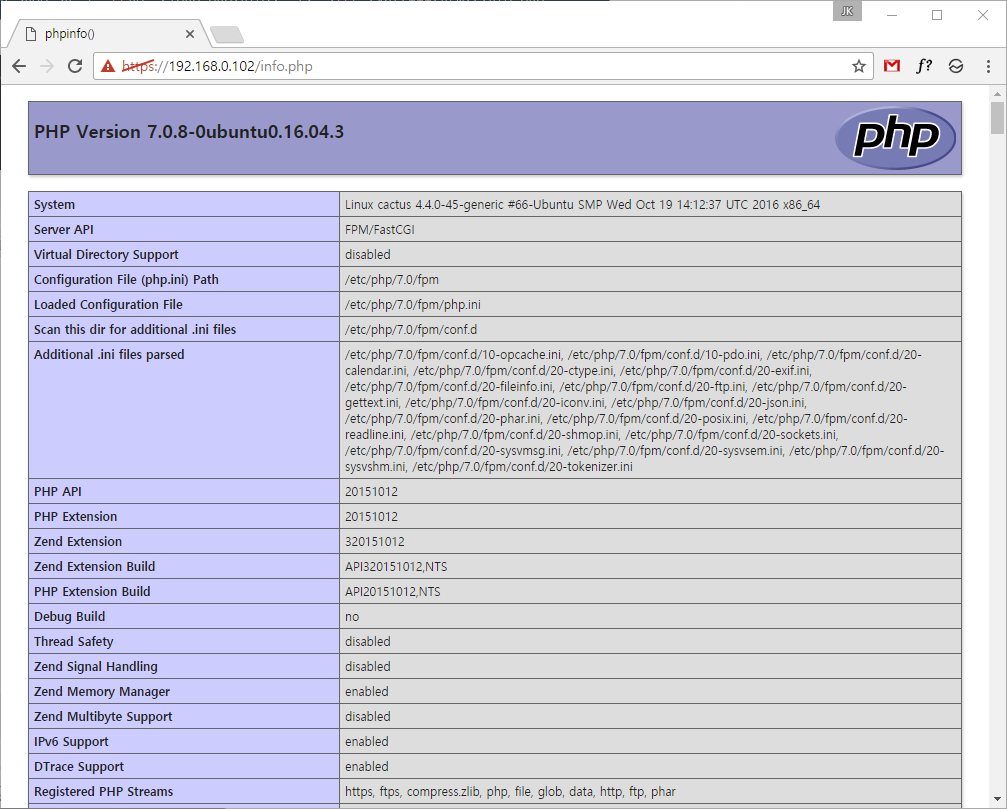
2. 아래 명령어를 통해 info.php 파일을 만들어 PHP 설정을 확인할 수 있다.
jkpark@cactus:~$ sudo su -c 'echo "<?php phpinfo(); ?>" |tee /var/www/html/info.php'
<?php phpinfo(); ?>
jkpark@cactus:~$


또한 $_SERVER['SERVER_PROTOCOL'] 항목에서 HTTP/2.0 프로토콜이 동작중인지 확인할 수 있다.

3. apt search php7.0 명령어를 통해 모듈을 검색할 수 있고
sudo apt install php7.0-**** 을 통해 모듈을 설치하였다면
PHP-FPM 데몬을 재시작하여 설치된 모듈을 등록할 수 있다.

sudo systemctl restart php7.0-fpm.service

Step4 : MariaDB 설치

1. 미지막으로 MariaDB를 설치하여 LEMP Stack을 완성시키자.

jkpark@cactus:~$ sudo apt install mariadb-server mariadb-client php7.0-mysql

설치 후 PHP-RPM 데몬 재시작한다.

jkpark@cactus:~$ sudo systemctl restart php7.0-fpm.service


2. mysql_secure_installation 스크립트를 실행하여 MariaDB의 root password를 설정한다.

jkpark@cactus:~$ sudo mysql_secure_installation

NOTE: RUNNING ALL PARTS OF THIS SCRIPT IS RECOMMENDED FOR ALL MariaDB
      SERVERS IN PRODUCTION USE!  PLEASE READ EACH STEP CAREFULLY!

In order to log into MariaDB to secure it, we'll need the current
password for the root user.  If you've just installed MariaDB, and
you haven't set the root password yet, the password will be blank,
so you should just press enter here.

Enter current password for root (enter for none):
OK, successfully used password, moving on...

Setting the root password ensures that nobody can log into the MariaDB
root user without the proper authorisation.

You already have a root password set, so you can safely answer 'n'.

Change the root password? [Y/n] n
 ... skipping.

By default, a MariaDB installation has an anonymous user, allowing anyone
to log into MariaDB without having to have a user account created for
them.  This is intended only for testing, and to make the installation
go a bit smoother.  You should remove them before moving into a
production environment.

Remove anonymous users? [Y/n] y
 ... Success!

Normally, root should only be allowed to connect from 'localhost'.  This
ensures that someone cannot guess at the root password from the network.

Disallow root login remotely? [Y/n] y
 ... Success!

By default, MariaDB comes with a database named 'test' that anyone can
access.  This is also intended only for testing, and should be removed
before moving into a production environment.

Remove test database and access to it? [Y/n] y
 - Dropping test database...
 ... Success!
 - Removing privileges on test database...
 ... Success!

Reloading the privilege tables will ensure that all changes made so far
will take effect immediately.

Reload privilege tables now? [Y/n] y
 ... Success!

Cleaning up...

All done!  If you've completed all of the above steps, your MariaDB
installation should now be secure.

Thanks for using MariaDB!
jkpark@cactus:~$

3. 일반유저가 sudo 특권없이 Database에 접근하기 위해 아래 명령어를 입력한다.

jkpark@cactus:~$ sudo mysql
Welcome to the MariaDB monitor.  Commands end with ; or \g.
Your MariaDB connection id is 48
Server version: 10.0.27-MariaDB-0ubuntu0.16.04.1 Ubuntu 16.04

Copyright (c) 2000, 2016, Oracle, MariaDB Corporation Ab and others.

Type 'help;' or '\h' for help. Type '\c' to clear the current input statement.

MariaDB [(none)]> use mysql;
Reading table information for completion of table and column names
You can turn off this feature to get a quicker startup with -A

Database changed
MariaDB [mysql]> update user set plugin='' where User='root';
Query OK, 1 row affected (0.00 sec)
Rows matched: 1  Changed: 1  Warnings: 0

MariaDB [mysql]> flush privileges;
Query OK, 0 rows affected (0.00 sec)

MariaDB [mysql]> exit
Bye
jkpark@cactus:~$

이제 sudo 없이 mysql에 접근할 수 있다.

jkpark@cactus:~$ mysql -u root -p -e 'show databases'
Enter password:
+--------------------+
| Database           |
+--------------------+
| information_schema |
| mysql              |
| performance_schema |
+--------------------+
jkpark@cactus:~$

4. 언어셋 설정
기본언어셋으로 utf8mb4_general_ci가 설정되어 있는데 이것을 utf8mb4_unicode_ci로 바꿔준다.
difference between utf8_general_ci and utf8_unicode_ci

jkpark@cactus:/etc/mysql/mariadb.conf.d$ sudo vi 50-server.cnf

105 character-set-server  = utf8mb4
106 #original
107 #collation-server      = utf8mb4_general_ci
108 #jkpark modified 2016-11-09
109 collation-server      = utf8mb4_unicode_ci


설정이 끝나면 mysql 데몬을 제시작하고 아래 명령어로 언어셋을 확인한다.

MariaDB [(none)]> show variables like "%character%";show variables like "%collation%";
+--------------------------+----------------------------+
| Variable_name            | Value                      |
+--------------------------+----------------------------+
| character_set_client     | utf8mb4                    |
| character_set_connection | utf8mb4                    |
| character_set_database   | utf8mb4                    |
| character_set_filesystem | binary                     |
| character_set_results    | utf8mb4                    |
| character_set_server     | utf8mb4                    |
| character_set_system     | utf8                       |
| character_sets_dir       | /usr/share/mysql/charsets/ |
+--------------------------+----------------------------+
8 rows in set (0.00 sec)

+----------------------+--------------------+
| Variable_name        | Value              |
+----------------------+--------------------+
| collation_connection | utf8mb4_general_ci |
| collation_database   | utf8mb4_unicode_ci |
| collation_server     | utf8mb4_unicode_ci |
+----------------------+--------------------+
3 rows in set (0.00 sec)

MariaDB [(none)]>

** collation_connection 은 utf8mb4_unicode_ci 로 설정이 안되는데 아시는분은 답글부탁드립니다.

이상으로 LEMP Stack 설치가 끝났다.